13: The Long Run to Lavaridge Town
Pokemon Emerald Walkthrough and Guide
13: The Long Run to Lavaridge Town
It is a fast run to Mauville and up Route 111 to the Route 112 Junction, so you should get to the entrance to the Cable Car with time to spare. A cute hostess escorts you on to the Cable Car and up you go!
When you exit the station you are confronted by Magma and Aqua Grunts really going at it! It is an all-out old fashioned free-for-all but the first thing that you notice is that it is all over the gaff, no direction at all. Run past the first pair and up to the steps past another group having it on and you will encounter a Doubles Battle with a pair of Magma Grunts blocking the path you need to take.
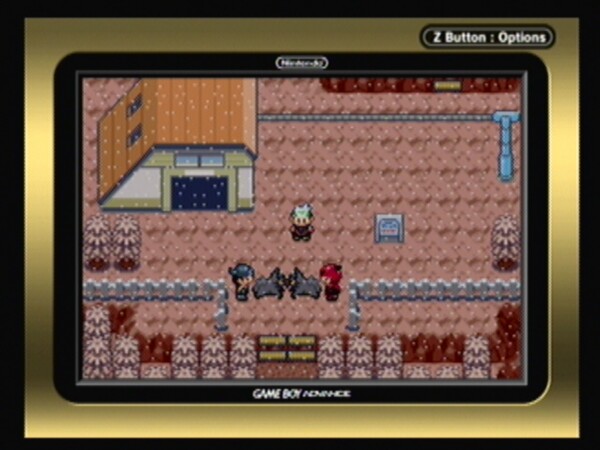 The battle at Mt. Chimney |
Put the beat-down on them and then continue north, where you have to battle one more Grunt before you reach the Team Magma Leader, who has set up some sort of machine at the top of the Volcano!
What he wants is to unleash the power of the volcano and the sun to dry up the oceans -- in the mistaken belief that doing this will make the world a better place.
After you defeat him the leader of Team Aqua runs up to chat with you, thanking you for your help. You have him very confused, wondering whose side you are on! Well, no matter, grab the meteor out of that diabolical machine and head down to the bottom of the stairs. Instead of using the Cable Car, take the exit below to the Jagged Path.
-- The Jagged Path --
- - - - - - - - - - - - - - - - - - - -
Route 115 Area Pokemon Report
-- #066 Machop (C)
-- #322 Numel (C)
-- #325 Spoink (C)
- - - - - - - - - - - - - - - - - - - -
Follow the path down, battling as needed, until you reach the bottom at Route 112. It is just a few steps west from there to Lavaridge Town!
-- Lavaridge Town --
Our first stop is the Pokemon Center, where we heal and save. This Center is a bit different than the others we have visited, starting with the fact that it has a back door! Go ahead and use that now, to discover the entrance to the Center's Hot Springs! How cool is that?
If you go into the hot springs and search in front of the two women in them, you will find a hidden Ice Heal -- grab that now -- then head back to the Center. You can have a chat with the Trainers in the Center if you like, then step over to the PC and deposit one of your team -- just for a moment mate, trust me!
With an open spot on your team head outside and to the left, where there is a hot sand bed you can soak in, but more important, an old woman standing there you want to chat up! When you do she tells you about this Pokemon Egg she has and how she wants you to hatch it for her! Go ahead and take the egg, soak in the hot sand if you like, then go deposit the egg in your PC and grab your team mate that you just put in there.
-- Lavaridge Pokemon Gym --
As we head to the Gym I want to remind you that this is a crucial victory -- the badge we are about to win will expand our ability to command Pokemon to Level 50, which as I am sure you have noticed we really really need! So when you go in here, use your best tactics -- work smarter, not harder!
For serious Trainer Fans in the audience, I wonder if you know that the Lavaridge Gym only appears in two episodes of the anime series -- in the first episode that it appeared in, Ash and his mates arrived to discover that Flannery was the new Gym Leader, having just taken over the position from her grandfather.
The Gym was in horrid condition, with holes in the battle arena floor and the decorations in tatters, so Ash, Brock, and Misty, along with the help of Max and May, offer to assist Flannery in cleaning up and fixing up her new Gym, the bulk of that activity taking up the episode. The second episode was of course the next one, in which Ash has his battle with Flannery.
As you chat up the Gym Greeter, you learn that the Leader here is Flannery, and he favors Fire-Type. Well, considering where we are that actually makes sense. Like most Gym Leaders, Flannery has fallen into the trap of preferring one Type, a weakness that we can use to our advantage!
First though, we need to take out his AGL's, so if you are ready we can start with that! To get to them we need to use the sand-teleport-pads -- so take direction mate, and do the following:
(1) Take the Pad to the bottom left here and then head east -- what looks like a Pad above you is an AGL, who will pop up to battle you!
Kindler Jeff has a pair of Level 22 Slugma worth 367XP each and $704.
(2) This is a dead-end area, so take the pad you used to get here back to the entrance and then follow the hall north to the next pad, head south along this very narrow corridor, and then west to the middle pad, which is actually an AGL!
Hiker Eli has a Level 23 Numel worth 433XP and $920.
Now step over to the pad below him - another disguised AGL - and trigger that battle. You could have fought these as a Doubles -- you can if you like -- but as this is a guide I am showing you them one at a time.
Kindler Jace has a Level 23 Slugma worth 384XP and $736.
(3) Take the pad to the west (closest to the wall) then go north to the bottom of the trio of pads for an AGL battle.
Cooltrainer Gerald has a Level 23 Kacleon worth 649XP and $1104.
Step to the pad to his right (by the wall) for the next AGL battle.
Kindler Cole has a Level 23 Numel worth 433XP and $736.
Directly to the north is the next AGL battle, the pad by the wall being where you want to step.
Kindler Axle has a Level 23 Numel worth 433XP and $736.
(4) Take the pad to the west to teleport to the next area, and then head north to the upper right pad in the corner here, which is really an AGL!
Kindler Keegan has a Level 23 Slugma worth 384XP and $736.
(5) Take the pad on the left to the next area, and then walk to the pad that is up and on the right for the next (and last) AGL battle!
Battle Girl Danielle has a Level 23 Meditite worth 448XP and $552.
By now most of your team members are really close to if not already at Level 30. You still have full control over them, but once they hit Level 31 they will not always obey you, so try to plan this out so that you use the best one for each of the upcoming battles and then switch to the next best one, thereby not finding yourself in a position where your troops will not follow the orders of their leader!
We need to leave the Gym and head back to the Poke Center now to heal and save, then hit the Poke Mart to replace any of the kit we used during these battles. With that done, return to the Gym and do the following:
(1) Take the North Pad
(2) Go west and take either one of the Pads past the two defeated Trainers here.
(3) Take the Pad to the north, then the next pad to the north.
(4) Take the pad above (to the north) that is to the left of the Trainer here.
(5) Go down the hall and take the first Pad you come to.
(6) Take the bottom right Pad.
(7) Go south (down) and jump down the ledge, then take the Pad here.
(8) You are now facing Flannery!
Our Battle with the Lavaridge Gym Leader
-- Gym Leader Flannery --
Leading with her Level 24 Numel, worth 451XP, she follows with her Level 24 Slugma, which is worth 400XP.
The next battle is with her Level 26 Camerupt, which is worth 975XP, and the finale features her Level 29 Torkoal, which is worth 1000XP.
Beating Flannery earns you $2900 as well as the Heat Badge -- allowing us to use the HM Strength outside of battle, but more important, allowing us to reliably issue orders to Pokemon up to Level 50, including ones we received in trade! Oh that could not have come at a better time, mate!
Flannery gives us TM50, Overheat, a very powerful move. Like all powerful moves though, it has a weakness -- the more that you use it, the lower your Special Attack power gets. You want to bear that in mind before you put that move in the number one slot on your moves list and use it as your main attack mate.
To leave simply jump down the ledge and hit the exit door! As you exit the Gym May turns up, and rather than be snarky or want to kick you around, she actually appears bearing gifts -- or rather "A" gift: the Go-Goggles needed to enter the nearby desert area! How cool is that?! You know I thought May was rather annoying, but now she is my new BFF!
Having delivered her pressie and her comments, she tells you that she is now off to battle your Dad, which means she is a bit ahead of us in the Badge Department mate, but still, good on her! I hope she does well!
Those goggles will come in handy mate, because now that we can control Pokemon up to Level 50, we need to batch-level our team to Level 45 like right now, and the desert is not only an excellent place to do that, it also has some Pokemon that we need to add to our Dex! Ah, but before we do that there are some minor chores that we need to take care of first, which I outline below!
-- Minor Chores that we need to Take Care of First --
(1) The Egg that we received from the Lady by the Hot Sands
Sitting in our PC Storage Box is the egg that the old woman gave to us. This is one of those things where it is simply easier to just deal with it head-on rather than try to work it in to some other plan. So head to the Poke Center and, after you have healed and saved your game, drop one of your team into their box and add that egg to your party.
You hatch eggs in this game by taking a certain number of steps. Usually the number is measured in the thousands, not hundreds, but that is not as daunting a task as you may think! With the egg in yourt pack, exit the Poke Center and walk over to the cliff wall to the left by the hot sands.
Face east.
It is exactly 25 steps from where you are standing to the end of the sandy road -- if you run east and stop just in front of the Hiker who is pacing back and forth at the ledges here, you have taken 25 steps. So all you need to do is run between these two points, over and over... And over... And over... Until the egg hatches!
Right, so go do that now. I will wait for you, just do not be all day about it then, will you mate?
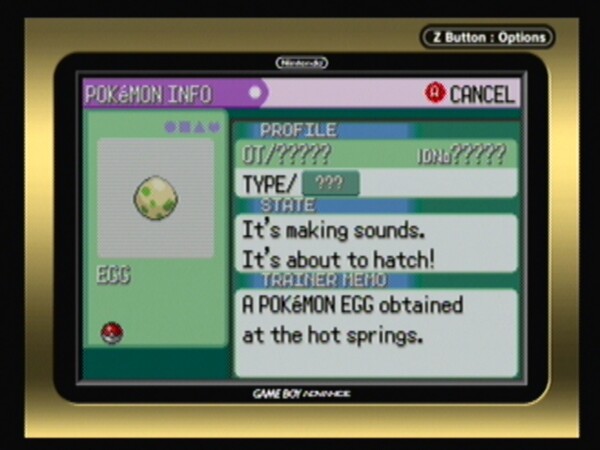 Hatching a very special egg |
Done? Excellent! And may I just add that I have never seen a finer specimen of Wynaut in all of the fourteen years that I have been a Pokemon Trainer! And you know what is bonus about this little guy? In addition to being cute, it evolves into #202 Wobbuffet at Level 15, a Pokemon that in the hands of a very skilled and experienced Trainer can be just devastating!
What makes this Pokemon so special? Well for one thing there is its ability: Shadow Tag. If you are not aware, this ability prevents an opponent from running or escaping, and if you have ever spent ages trying to capture a Legendary or a Pokemon like Abra that will flee at the drop of a hat, you can easily see the value in that!
At the moment we do not have time to do anything with her (I ended up with a girl, but the gender distribution on this one is 50/50 so you can easily get a breeding pair if you like) so for now pop her into a box in your PC. We will work on leveling and evolving her when we get around to doing our preparation work after beating the Elite 4 in order to complete our Dex and prepare for chasing down a certain Legendary Pokemon who shall remain nameless for now...
(2) Wrapping up Lavaridge Town
If you have not already done so, we need to complete the things that we need to do in Lavaridge, because shortly we will be leaving, and this is not on our list of revisits in the near future mate!
So first, if you did not visit the hot springs do that now, and grab that item from the floor of the hot spring.
Next, chat up everyone in town, because you can learn some things here you may not know.
Visit the Herb Shop (the building across the path from the Gym) and chat up the old man inside, who will gift you a held item called Charcoal that is very useful for Fire-Type Pokemon, as it raises the power of any of their Fire-Type moves while they are holding it.
The counter woman at the Herb Shop will sell you her wares, but you should know that unlike Potions and the like, Pokemon do not particularly care for this sort of thing, and using it too much can have some unexpected results, starting with lowering their affection for you! I know that these items are cheaper, but in the world of Pokemon, just like in ours, you get what you pay for!
Visit the house next door to the Herb Shop and speak with the man there to learn just where that egg you were given came from! Now you know for sure - though you really already knew - where little Pokemon come from! Before you leave talk to their son by the table if you want to have one of your Pokemon learn the move Mimic. If you do not want to have that taught to one of your team, just make a mental note that this is where the move tutor is for Mimic in case you want it in the future!
This concludes everything that we need to do in Lavaridge Town -- so we are going to leave now. Before we do that, pay one final visit to the Mart and top off your kit, then head to the east!
(3) Batting Clean-Up: Gathering in any missed Trainer XP
As you read a few minutes ago, we are about to go into our second major batch-leveling event, and as that can be a rather worrisome and boring endeavor, it behooves us to backtrack and fight any Trainer Battles that we may have skipped -- either by accident or on purpose -- in our journey to this point.
This also sets us up nicely for another chore we need to do, so for now, head east jumping down the ledges -- pausing to grab the Nugget from the Treasure Ball mid-way down -- to continue on the Route, then use the north up the stairs to head back up the Mountain.
Take the scenic Cable Car ride to the top and then battle any and every Trainer that you did NOT battle on your way up the first time, and be sure to buy a few Lava Cookies from the vender outside of the Cable Car Station when you arrive, right? This is the only place you can get those, and they function as a Full Heal, removing ALL status problems from your Pokemon! A good thing to have in other words.
I suggest buying around 10 of them if you can afford it, in fact as a general rule I always try to keep 5 items of each kit type on hand if possible, so as not to run out, but as this is a rarer item that you can not buy elsewhere you should probably double that number.
Once you complete the full circle and end up back in Lavaridge Town, head back down the path to the Cable Car Station to do the next chore.
Note: To capture a Spoink you will need the Acro Bike. On the Jagged Path there is a spot on the right as you descend that has round stones that give access to the Tall Grass below. The only way to access this is to use the Acro Bike.
Simply mount the bike, move next to the stone, then hold down the B-Button and then snap the left joystick towards it to engage the jumping feature. Once you have it engaged simply hop from stone to stone until you reach the Tall Grass, then troll until you pull a Spoink and capture it! Easy-Peasy Lemon Squeezy!
After you battle the lone Magma Grunt who seems to be lost, be sure to grab the Treasure Ball to the right that has a Burn Heal in it -- it is always nice to find Free Kit!
By the time you reach town you should have added a few levels alone just by cleaning up the Trainers you missed or skipped, so good on ya mate!
(4) The Fiery Path
Now that we can use HM Strength outside of battle we need to pay a quick visit to the Fiery Path, where if you will recall there was a branch that we could not explore because we did not have Strength in our move lists.
This is your additional chance to capture Grimer and Torkoal if you have yet to do so -- so do so!
Using HM Strength you will push the boulder that is blocking the path west until it hits another boulder, then walk around, push the second one north, then the first back to the east so you can move north to the 3rd boulder, which you push west just enough to be able to get past it and head north.
Grab the Treasure Ball here and TM06, Toxic -- which is really why we came here -- then head south to the next boulder and push it south and then east against the wall. This is tricky and easy to mess up by accident, but you need to move the second boulder east then walk around the third one to head south here.
At the bottom of this dead-end area is another Treasure Ball with a precious Fire Stone in it! This is an evolution item, and the other reason we came here. Now that you have this, backtrack and leave the cave, because assuming you got all of the Pokemon from here, we are done here! Just use an Escape Rope mate, no sense in backtracking.
(5) Back to Fallarbor Town
Now that you have the Go-Goggles just run through the desert to Fallarbor town; on the way grab the Treasure Ball with its Stardust, and capture a Trapinch and Baltoy - hey why not?
When you reach Fallarbor Town go to the Professor's House and deliver the Meteor that Magma stole back to him, and in exchange for it he gives you TM27, Return. Now that this good deed has been done, there is only one thing left for us to do here -- the Soot Collection.
If you are like me, all you did was collect enough Soot to get the Red and Yellow Flutes, as those are clearly the most useful. Well, that is true, but you need the Blue one too, and the Black and White ones would be good to have... I don't care about the furniture, but if you do, get that as well, either way, but head over to the Soot Fields and begin harvesting mate.
Just to be clear this is actually a two-fer -- you are harvesting the Soot you need and in addition shaving a lot of time off of our batch-leveling we will shortly be doing in the Desert! Win-win mate! So do battle the wilds you pull in the process of gathering Soot, won't you? Be sure to Level your team equally so none get too far ahead of the others, right?
We are shooting for Level 45 over-all, but that is not going to happen here. Still you can get a good jump on the leveling.
When you have all of the Glass Blower Items, head towards Rustboro to clean-up any Trainer Battles you missed on that Route and through the Cave past the Falls and, once you reach Rustboro, head through the Cave and back to the other side of the map, get to the Desert and begin the batch-leveling process until you have your entire team at around Level 43 to Level 45!
- - - - - - - - - - - - - - - - - - - -
Desert Ruin Area Pokemon Report
-- #343 Baltoy (R)
-- #331 Cacnea (U)
-- #027 Sandshrew (U)
-- #328 Trapinch (C)
- - - - - - - - - - - - - - - - - - - -
If you are missing any of the above from your Dex you should have no troubles at all capturing them during the batch-leveling!
Pokedex | More Emerald Stuff on SuperCheats.com
I think the guy that wrote this guide is using a team of nothing but traded Pokémon because the badges only affect traded pokemon
The gym was super easy I beat everyone with one Pokemon wingull lvl 26
Don't you mean lvl 35?
A big note if you're working on an egg, if your lead pokemon has the ability (not move) Flame Body, or Magma Armor, it will half the number of steps needed to hatch.
@ Blisseybro, If your geodude or Solrock can use Magnitude, use it against any opponent that is part rock especially, but it is also amazing against pretty much everything. You might want to level up some more as well before taking the gym.
This is so hard, the fact that I have a terrible team, and that this gym is one of the hardest gyms I have ever been in. I have Geodude level 21, Sabeleye level 26, Solrock level 17, Wingull level 17, Grovyle level 31, and Makuhita level 17(ability: thick fat).>:(
Badges only affect the obedience of TRADED pokemon, not ones that you have raised. Otherwise, level 7 pokemon wouldn't obey you when you don't have any gym badges...so don't hold out on your training unless you want to catch pokemon.
i like the guide and codes very hey friends if u have any nice code please tel to me i'm not able to go to fotree and also i;m ur frend