Mission 6: Kadingir Sanctum
Thank you for printing this page from www.SuperCheats.com.
Remember to come back to check for updates to this guide and much more content for Doom (2016)
Follow this guide to hear about updates
Last Updated:
Head down the path and use the skull to continue. A hologram appears; you'll need to follow these former UAC members to get to the exit transporter out of hell. Easier said than done, of course.
Continue and drop down, then shoot the Unwilling and grab the Gauss Cannon from the case if you didn't already have it. Go up the stairs and defeat more enemies. Don't drop down just yet; instead check out the left side at the top of these stairs to find some stone platforms leading back to a full armor; this counts as a secret.
Mission 6 - Secret
Drop down to the next area and check out the left side to spot some Mancubi down below. Use the rocket launcher or gauss cannon to soften them up, then head down and defeat the rest of the monsters. Drop down to the ground floor and look for a skull artifact to open a door (also on the ground floor) that leads to the yellow skull (equivalent to a keycard).

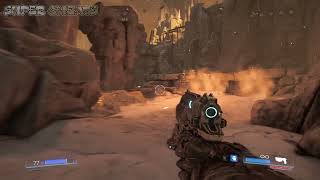
Mission 6 - Elite Guard
Head back up via the stairs to the previous area and use the skull on the yellow door to continue. Inside the cave you'll find an Elite Guard and an artefact. In the area up ahead, first kill the Unwilling from a distance with the Pistol. Move a little further, then back again and kill the spawned Imps with the Pistol. After this, pull out the Assault Rifle and continue. Two Summoners spawn, along with some lesser demons. Quickly go after the Summoners with the Plasma Rifle or Assault Rifle, then use the Super Shotgun to eliminate any Hell Knights, then defeat the Imps and Hell Razors with the regular shotgun.
Search for the waypoint marker and go through the cave. Platforms rise up in the next area, which is in fact the beginning area. Now you can make your way to the far upper end. Use the skull, then go down and through the red gate that has opened up below. Clear out the Unwilling inside the cave. Before going through the portal, check out the area to the right to find the Astroguy collectible.
Mission 6 - Astroguy Collectible
After going through the portal, grab the Blue Skull and head back down to the now familiar area. Defeat the demons, including a new species; the Cacodemon. These will try to munch you, so don't let them get close and use the Plasma Rifle to keep them away. After clearing out the area, wait with going through the blue door.
Instead, look for the archway on the bottom level (below is a cave with only one green torch inside) and climb atop it. Look for a floating platform (which has a chain attached to it) and jump on top of it. From here you can jump to a ledge up ahead to reach a secret leading to a Rune Trial. You'll have to reach the end of the walkway, but you can only move after killing Imps. Take your time getting used to this new mechanic and move to the end ASAP.
Back in 'reality' - that is, hell - go through the blue door. Inside this hall, check the right side for an Argent Cell. Upgrading your ammo is a good idea at this point. The next area contains several demons. Kill the lesser ones with your Pistol and backtrack into the cave to pull out your rocket launcher and wait for the Mancubi to try and enter. Unleash a series of rockets on them at this point to quikcly waste them. Proceed down the walkway up ahead and drop down to the side to find the Chaingun. Climb back up and use the upper platforms to reach a cave in the distance. At this point, Lost Souls will have entered the battle. These are essentially floating bombs; quickly dispose of them with the shotgun.

Mission 6 - Chaingun
After going up through the cave, check out the right side of the path to find an Elite Guard. A few Cacodemons show up in the distance, so take out your Plasma Rifle or Assault Rifle and destroy them.
Jump onto the floating platforms up ahead to reach a skull switch that unlocks the door down below.

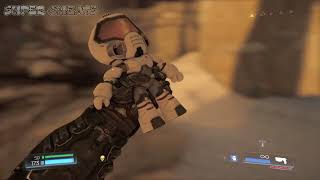
Mission 6 - Elite Guard #2
Go through the door and prepare for another battle. There are a lot of pickups here, including a yellow Haste powerup. Use the Super Shotgun to defeat the Revenants and Hell Knights, then switch to a regular shotgun for the rest. After clearing the area, look for an AutoMap in one of the caves (it looks like an orb on some sort of altar/statue).
There's also a Rune Trial to the left of the long exit stairwell. You must perform three Death from Above Glory Kills on Hell Knights in this trial. As long as you remember that you don't have to use the stairs or anything, but can just perform this special Glory Kill with a simple Double Jump, you'll be able to quickly complete it.

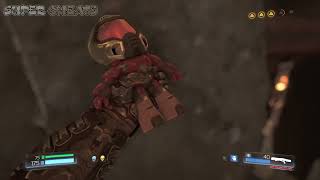
Mission 6 - Elite Guard #3
Back in hell, check out the portal to reach a room with an artifact. Go through the adjacent tunnel and collect the Data Log on a rock. You'll also spot an Elite Guard at the end. Now go back and all the way down the previous area (where you had a fight). Check out the stairs leading up and follow them about halfway up, then check the right side to spot an odd-looking, rectangular stone wall. Double jump up to it to find the Redguy collectible.
Mission 6 - Redguy collectible
Continue to the top of the stairs and look for a Data Log and Field Drone before continuing. In the next area you'll come across a very powerful new enemy type, namely, the Hell Baron. These massive demons pack a heavy punch and can hurl green dots of energy at you. If you have enough chainsaw fuel, defeating one of them this way is a very smart move. The others should be taken down from a distance with the rocket launcher or the plasma rifle. There's also a Quad Damage powerup on the upper bridge which will help significantly in defeat the last batch of Hell Barons.
When the area has been cleared, enter the cave opposite of the double doors to find a lever for a Classic Map. Pull it, then go towards the bridge in front of the door and drop down on the right side. The Classic Map can be found behind you, where you'll find a Megahealth at the end that boosts your health and armor to 200. Nice!

Mission 6 - Classic Map
Go back and through the double doors, defeat the Unwilling and Lost Souls, the two Revenants up ahead, and the Mancubus down below, then grab out your Plasma Rifle to defeat the two Cacodemons coming at you. Jump down from platform to platform and collect the Data Log below, near some health pickups and fuel. Some Unwilling and a Mancubus attack from the path up ahead.
Continue upstairs and follow the trail up to a large square where some Unwilling are located along with some Imps. A final Elite Guard can be found on the left side of the square. At the far exit on the other side you can find a Data Log.

Mission 6 - Elite Guard #4
Continue into the next area and prepare for another huge fight. For the first part of the fight, equip the Super Shotgun and eliminate the two Hell Knights ASAP with it, then go for the Revenants (killing Imps and Hell Razors in between). When the Mancubi show up, grab the Quad Damage powerup, QUICKLY eliminate them with the Plasma Rifle and wait for the two Barons of Hell to show up, then quickly eliminate them with the Plasma Rifle while still in Quad Damage mode. After this, finish off the remaining demons with the regular shotgun and finish the chapter by using the console at the end of the area.
Anything missing from this guide?
ASK A QUESTION for Doom (2016)
Comments for Mission 6: Kadingir Sanctum
Add a comment
Please log in above or sign up for free to post commentsNo comments yet. Tell us what you think to be the first.
Table of ContentsClose
Guide Updates
Get notified of updates to this guide
Many of our guides get updated with additional information. To get an email when this guide is updated click below.
 Join us on Discord
Click to close