General Farming - Levels 11 thru 15
BEFORE YOU READ ANY DEEPER: Before you read any further into this Section of the guide it would be a very good idea (think of it as a mandatory suggestion) for you to jump ahead to the next section of the guide, whose title is: Levels 10 thru 15 Resources War Chest and read that section in its entirety because among other things it will clue you in on what elective crops you should be growing and what important resources you should be accumulating BEFORE you actually need them.
This will save you an incredible amount of time and, what is more likely, prevent you from selling off large amounts of resources that you may already have for short-term gains and in the process, and at the risk of repeating ourselves, save you scads and scads of time, effort, and money.
Are you back? Did you read that section completely? Well then good on ya mates! You now are aware of the tactical situation with respect to the resources and Crafting components that will be significant throughout the next five levels, which puts you way ahead of the average player!
Welcome to Level 11
As the next stage in your agribusiness simulation adventures commences you should stop for a moment and note that having reached Level 10 in the previous stage you have actually arrived at the point at which the playing field is now level, with access to a majority of the value-added in-game features now being within your grasp considering that the magic level for most of them is in fact Level 10.
Tactic Tip: Ensuring you collect an item when helping your friends
The ability to visit your neighbors and friends and help out on their farm is a very valuable element of farming in Farmville, but wouldn't it be nice to ensure that you at least get an item you want and need for your efforts? When it comes to feeding animals you can!
The game is set up to give you a resource that is produced by the item you help on randomly, but whe
n you use four of your five helper moves all at once by servicing a Tree Grove, you are virtually guaranteed that the next single item you service will result in receiving one of the resources that it produces. This can be especially valuable to yourself AND your neighbors when you use that fifth helper action on one of their pigs - since it guarantees you one of the Mud Buckets (an exceedingly valuable and hard to obtain item).
The only time that I have experienced this tactic to fail was when the game produced the rarer Truffle resource in place of the Mud Bucket, but I certainly could not complain about that!
Not only do you end up getting a Mud Bucket, but your neighbor gets one of their Groves services, AND when your avatar services their pig, they receive TWO Mud Buckets as a result, which any way you look at it is a Win-Win-Win event.
Starting Out on the Next Surge
The first stage for this part of the guide is unlocking Level 11, which in addition to other craftable Items unlocks the Angora Rabbit (Wool source), the Peach Tree, and Peach Lemonade - the latter two being crucial for some of the missions and quests you will be completing.

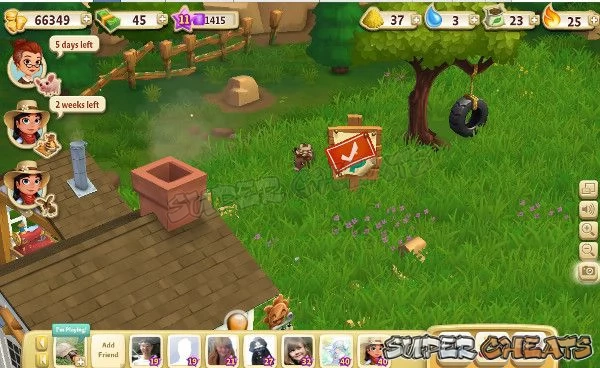
Now that you have unlocked Level 11 you are able to clear the top-left-hand section of the “back 40” we were discussing earlier. To do that you will need to collect the Items from your neighbors, have $50,000 and also make 9 Peach Lemonade. But to make the Lemonade you are going to need Peaches, and since you just unlocked the Peach Tree, it would be an idea to plant four of those now!
Once you have them planted there will be a wait of a few hours for them to fruit, during which time you should get your mates to send you the Items you requested and you should prep for the Crafting by making the 9 Lemonades that you will need to make the Peach Lemonade with. In addition to that of course, you need to be sure you actually have the $50K to pay for the Section - if you do not, start crafting and get it...
Using the 7th Section
The most practical use for this new area is to move your buildings and Crafting structures back into it, and extend the Animal Pen one or two lengths of fence in order to make more room within it both for Animals and their Structures.
That will give you more room to place additional trees, but you should be thinking about getting any outstanding construction projects completed and then focus on building Groves as that allows you to better use the land you have available now.
Before you can begin to use that though you will need to relocate the baby Longhorn Cow that you obtained in the clearing of the new section, as well as clearing the two large rocks that are blocking your use of the land (this requires x4 Pickaxes you must request from your mates as well as their donated labor in clearing them), and relocating and completing the Water Trough that was revealed as being beneath the tall grass of the section.
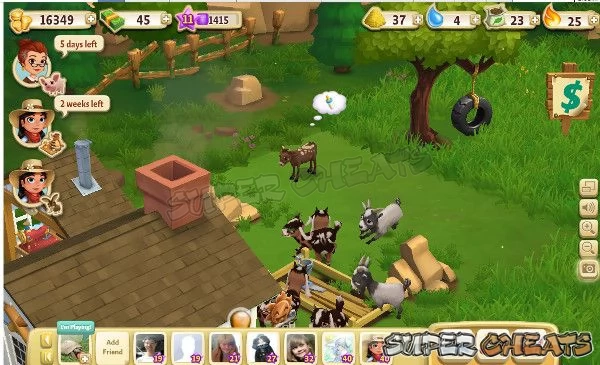
The Water Trough will require a total of x8 Wood Planks and x4 Metal Ingots, as well as the volunteer labor of three of your mates. Constructing that will boost the Farm Animal Population limit from the current 25 Animals to 30 which is nice for what amounts to a freebie boost.
You can relocate the Cow and the Water Trough now, but the Rocks you have to clear and that means obtaining the help of your mates assuming that you do not have the Picks to complete the first phase of clearing each (and you likely do not).
On the plus side, each of those large Rocks that you clear will give you Bricks and Fertilizer Bags. Evolving the Longhorn Cow baby to its Adult form requires x5 Baby Bottles, and completing the Water Trough boosts the Farm Animal Cap which means that this Section actually was well worth the cost and the effort...
With the new area, once you have moved your buildings and the other structures and extended your Animal Pen by one fence length, you now have adequate space to rank your Trees in a line of two tree types (by four if you are following along) which means you can now add another row of Crop Squares (and it is about time that we did that) which will give you a total of x40 Crop Squares. Once you do expand the Crop size, it is also time to start thinking about adding a third Water Well, but before you do that you should complete ALL of the outstanding construction projects.
Keeping the Collection Resources Flowing
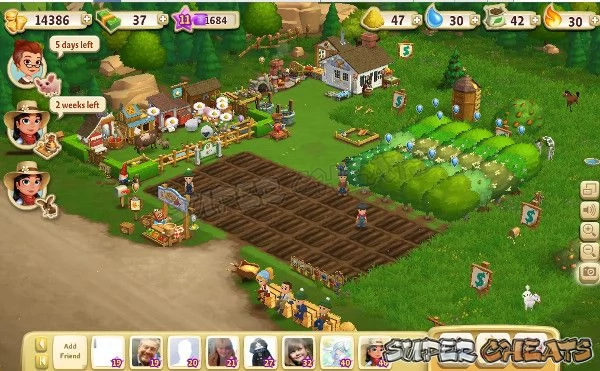
Another of the Items on your general to-do list should be maintaining the flow of the collection-based resources, which for you at this point in time should include at a minimum the Exotic Egg Collection Eggs from the Hen House (not to be confused with the Chicken Coop, which is for Prized Chickens), which is on a 24-hour timer that will only run if you have the minimum amount of Adult Chickens available.
The Hen House is harvested once every 24-hours, and in addition to providing you with a supply of Eggs, also has the chance of delivering an Exotic Egg of one of the five types; there are two types of Uncommon, two types of Rare, and one type of Ultra Rare Eggs to be had here. Completing the collection results in the reward of a Polish Silver Laced Chicken, which in addition to being a rare type of Chicken is also a good source for Red Eggs and Fertilizer.
Most of the Collection Items are inter-related, or at least inter-dependent. For example you need X number of Adult Chickens to keep the timer on the Hen House going, while each adult animal you feed has the chance to generate bags of Fertilizer which in turn advances the meter on the Fertilizer Bin. Each time you feed a “Dairy” animal (Goats and Cows), in addition to potentially advancing the meter on the Fertilizer Bin you also advance the meter on the Yogurt Creamery.
The Yogurt Creamery requires cream droplets that are stored in its Milk Can and, when you have accumulated x40 droplets it can be harvested to obtain regular Yogurt as well as a chance for one of the special grades of Yogurt. Completing the Yogurt Collection requires x6 Uncommon (Orange Top) Yogurt, x4 Rare (Blue Topped) Yogurt, and x2 Ultra Rare Yogurt, the prize for completing that collection being a Highland Cow, which is a rare and special cow that delivers its own set of resources as an Adult and then as a Prized Adult.
The Yarn Collection is completed by feeding Wool-producing Farm Animals, which each time you feed them in addition to the regular Wool that they ordinarily provide also have a chance to produce a random number of the special Wool that is used by the Spinning Wheel for making Yarn of various grades in quality for the Yarn Collection.
The Yarn Collection requires x6 Fine Yarn (Silver Yarn Ball), x4 Super-Fine (Pink Yarn Ball), and x2 Premium Yarn (Gold Yarn Ball), with the special Yarn for this collection accumulating in the Yarn Basket connected to the Spinning Wheel, which requires x25 of the special Yarn Clumps in order to make the Spinning Wheel harvestable. When you complete the Yarn Collection your reward is a rare and special type of sheep called a Manx Loaghtan Sheep.
Another related element to the Yarn and Wool production is the random chance of obtaining a Golden Fleece while harvesting the Sheep Shack, which is the structure that houses Prized Sheep. The Golden Fleece is used for Crafting via the Workshop.
There are other relational aspects to all of these seemingly separate elements in the game, but in the end as you can see they are all largely related to each other, or at least contribute in a passive way to each other, which is why part of your regular routine should be to maintain the flow of all of these by complying with their individual requirements.

Better Organization
Chances are by the time you get the Grove construction process started in earnest the completion of each Grove Structure will be cause to celebrate, as you finally are able to get the ever-expanding collection of trees into some semblance of order! By this point in addition to the fruit trees you already have planted you are going to also need to plant a few Pine Trees as they are a critical resource by this level, since they are the primary source for Pieces of Wood, a resource we will need a LOT of.
Generally speaking, if you can keep your Farm Animals all fed, your Crops in full rotation, and your Trees watered, you are doing very well, though probably under some strain. After you finish the backlog of construction projects and get the Groves in production, you will want to save up the coin to place a third Water Well, since you have room for it and having that extra x10 WRU's will help reduce the strain of needing to log an extra session each day just to keep everything rolling.
Now is a good time to assess your current Mission and Quest load to see if there are any resource producers that you are lacking. If you have yet to buy a horse (which is your source for Horseshoes) now is the time to do that.

Tactic Tip: Ensuring a Constant Flow of Farm Animal Resources
The Introduction of the Prized Animal System threw something of a monkey wrench into the established system of Farm Animal Resources collection for most players in that it introduced an entirely new set of resources that had to be stockpiled for use in the Crafting system. The eventual inclusion of these special resources in the Items required for the Mission/Quest system added to the urgency of including these mature animals in the standard supply chain, but there was a rub...
Logic dictates that eventually every animal that you place and evolve on your farm will eventually make the transition to Prized Animal status - and this is true - but when there is no special structure set aside and available for that particular type of Farm Animal, it becomes necessary to add it into the running cap for all Farm Animals, which makes maintaining a reliable supply of standard resources a bit more complicated.
While these new resource-producers can add a bit of chaos to the order you are imposing upon your farm, you can use the animals who do have Prized version shelters to offset that. For example if you look into your Chicken Coop and discover that it is filled with Prized White Chickens, there is an excellent target for thinning while improving your results.
Check your outside population and, where you have special types of chickens who have attained Prized status - for instance the Polish Silver Laced Chickens from the Egg Quest and any Rhode Island Reds you have that are Prized - remove a Prized White Chicken from the Coop and replace it with the special version of Prized Chicken, and then sell the Prized White that you just removed for the coin and to make room for a new animal as per the population cap.
You can do virtually the same thing with the Sheep Shack and the Goat Shelter, and following those adjustments, stick to only placing special types for each until your Prized structures have no more regular types. This will improve both the quality of the Items you are harvesting when each structure is services, and allow you to have more visible control over the regular class of resources, which are now largely “outside” animal based.
The Arrival of the Mud Wallow
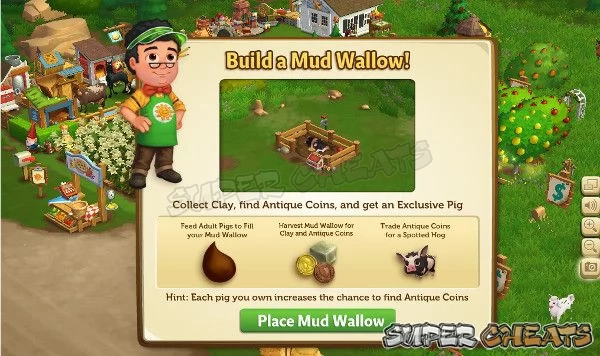
The next significant phase in the new Pig-centered Crafting initiative in the game is the arrival of the Mud Wallow, which is a rather unique new structure in that it leverages the new Pigs in the game to add a new type of crafting and crafts resource source. You may be thinking “Great, another structure I have to find room for and deal with!” and that is fair enough as far as that goes, but then you may change your mind when you learn how the Wallow works and what it does for you...
Like the Fertilizer Bin and to a lesser extent the Yogurt Creamery, the Mud Wallow is “filled” when you feed your pigs, and when it is harvested it produces Crafting resources in the form of Clay and Antique Coins, the former being purely a crafting resource, while the latter can be accumulated until you have a sufficient number in order to trade them for the new Spotted Hog Farm Animal, making for a circle of life all its own!

After you place the Mud Wallow Structure construction project, the Village Grocer appears on the road with his pet Spotted Hog and Tips you off to the fact that he has heard you are building a Mud Wallow and that he will be happy to trade you Spotted Hogs in exchange for any Antique Coins you find once you find enough of them.
After you complete the Village Grocer dialogue you are presented with the Wallow's build screen, which reveals that in addition to the x10 Faucet Piping that you need to acquire by asking your mates for some, you also need to directly request x10 Red Balls and x10 Pig Fence Posts from your friends and neighbors.
If Wishes Were Pigs
As with the previous major game structure and Crafting expansions, the new Mud Wallow has its own Mission associated with it, which is called “If Wishes Were Pigs” and includes a total of 10 Quests, the first of which is called Dig Deep, and has the player completing the Mud Wallow, using their Wells, and feeding Adult Pigs - basically related and somewhat related activities that are pig-centered.
The rest of the Quests for the Mission follow a similar vein, and will help keep the player focused upon the new addition to the game, so this is where we caution you not to allow the game to force your attention on too narrow a focus, since the entire point of that is to convince you that it would be a good idea to spend Real-World Money to get that Mission and its Quests to progress faster rather than to take your time and do it naturally.
Another concern is to remember not to focus all of your efforts in that one specific area - if you still have construction projects that are not completed from the first wave of post-Level-10 building you really should continue to focus upon completing those, and of course you need to maintain forward progress in the building and deployment of Tree Groves until you have your Tree situation under control and that very necessary resource producing portion of your Farm is not occupying more land than it should.

Arriving at Level 15
You no doubt have noticed that the time between level-ups is growing a bit longer, which is natural considering that the required XP between levels is also growing a bit steeper, so that arriving at the Level-Up points is now starting to feel like real progress.
At this point assuming that you have been keeping up with the construction projects you should be in pretty good shape. Your farm should have the following completed structures on it in approximately this order:
- Crafting Kitchen
- Crafting Workshop
- Water Wells (your target is x3 for this structure)
- Furnace (for +10 PRU's on-demand)
- Shady Trough (+10 to Farm Animal Capacity)
- Feed Mill
- Fertilizer Bin
- Hen House for the Exotic Egg Collection
- Chicken Coop for your Prized Chickens
- Goat Shelter for your Prized Goats
- Yogurt Creamery for the Rare Yogurt Collection
- Sheep Shack for your Prized Sheep
- Spinning Wheel (hosts the Rabit/Sheep focused Yarn Collection)
- Tree Groves (the number will depend on how industrious you are)
- Mushroom Shed* (hosts the Catch That Little Piggy Missions)
- Crafting Kiln
- Mud Wallow with at least 4 Pigs to make it active
* If the quests that are associated with this item have expired the game will have an alternate means to introduce the associated content that will not include placing this structure, so if you were not playing the game when it was introduced you will not be able to obtain it.
In addition to the above structures you should by now have a collection of Crop and Animal Mastery signs, which are a carry-over from the original Farmville and attest to your abilities as a farmer. Note that in the original game these actually had a function in that they informed your visitors what Crops you were able to grow at mastered level in the event that they wished to order them from you for the secondary Crafting system in the game. In Farmville 2 these are purely decorations.
If any of the structures listed above are incomplete in their construction (not including the Tree Groves) those are what you should focus upon for the remainder of Level 15, with your goal being to have them completed prior to reaching Level 16, which is where the next Section of the Guide begins!
Anything missing from this guide?
ASK A QUESTION for FarmVille 2
Comments for General Farming - Levels 11 thru 15
Add a comment
Please log in above or sign up for free to post comments- Introduction
- New Version Changes
- The Plight of the Small Farmer in Farmville
- Starting Tips, Tricks, Strategies, and Good Game Play Habits
- The Farmville 2 Economics Overview
- Establishing Good Play Habits
- The Missions and Quests Primer
- Known Bugs and Server Issues
- Current and Recent News
- Walkthrough / Guide
- Reference Sections
- Structures
- Special Events
- Addendum
 Join us on Discord
